Anypoint Connectors provide a connection between a Mule flow and an external system — such as any source of content, database, protocol, or API. While there are thousands of out-of-the-box connectors in Exchange, sometimes you need a custom connector to meet your specific needs.
In some situations, you may not find the appropriate connector to integrate your systems or the connector you need lacks a specific functionality you need — such as error handling or custom logging — that you’ll need to reuse for multiple projects.
This blog post will show you how to create your own custom connector using the new Mule SDK platform for Mule Runtime 4.
Prerequisites:
This blog assumes you are familiar with Anypoint Studio 7+ and have installed the appropriate versions of JDK, Anypoint Studio 7+, and Maven as specified in. See more on how to set up your development environment.
Creating a custom connector with Mule SDK
To create the project for the connector, run the command below in the command prompt where you want to create the project. Since there is currently no way to create connector projects from Anypoint Studio, we need to use a Maven archetype.
Step #1: Command prompt
Open command prompt/git bash where you want to create the project and run the below command as shown below:
mvn org.mule.extensions:mule-extensions-archetype-maven-plugin:generate
Step #2: Configure
Once you execute the above command it will ask you to provide the below configurations:
- Name of the extension
- Extension’s groupId
- Extension’s artifactId
- Extension’s version
- Extension’s main package
Provide those details as below:
- Enter the name of the extension: DemoConnector
- Enter the extension’s groupId: com.Demo.muleConnector
- Enter the extension’s artifactId: mulesoft-demo-connector
- Enter the extension’s version: 1.0.0
- Enter the extension’s main package: org.mule.extension.Demo
Once the build is successful, go to your folder and you will find a connector package with the artifact-id.
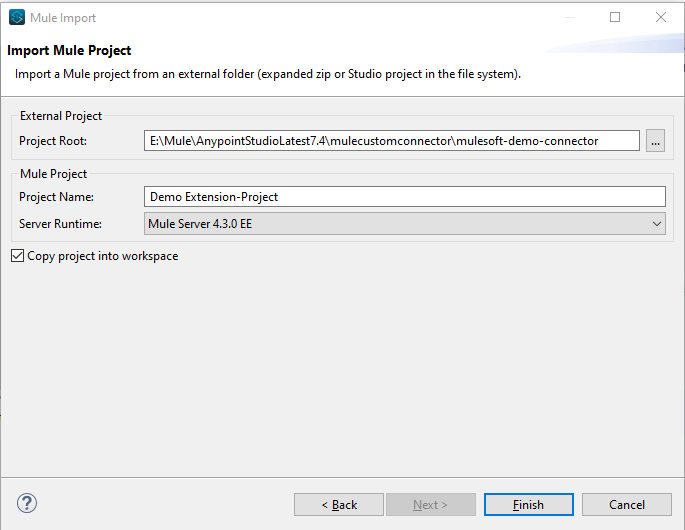
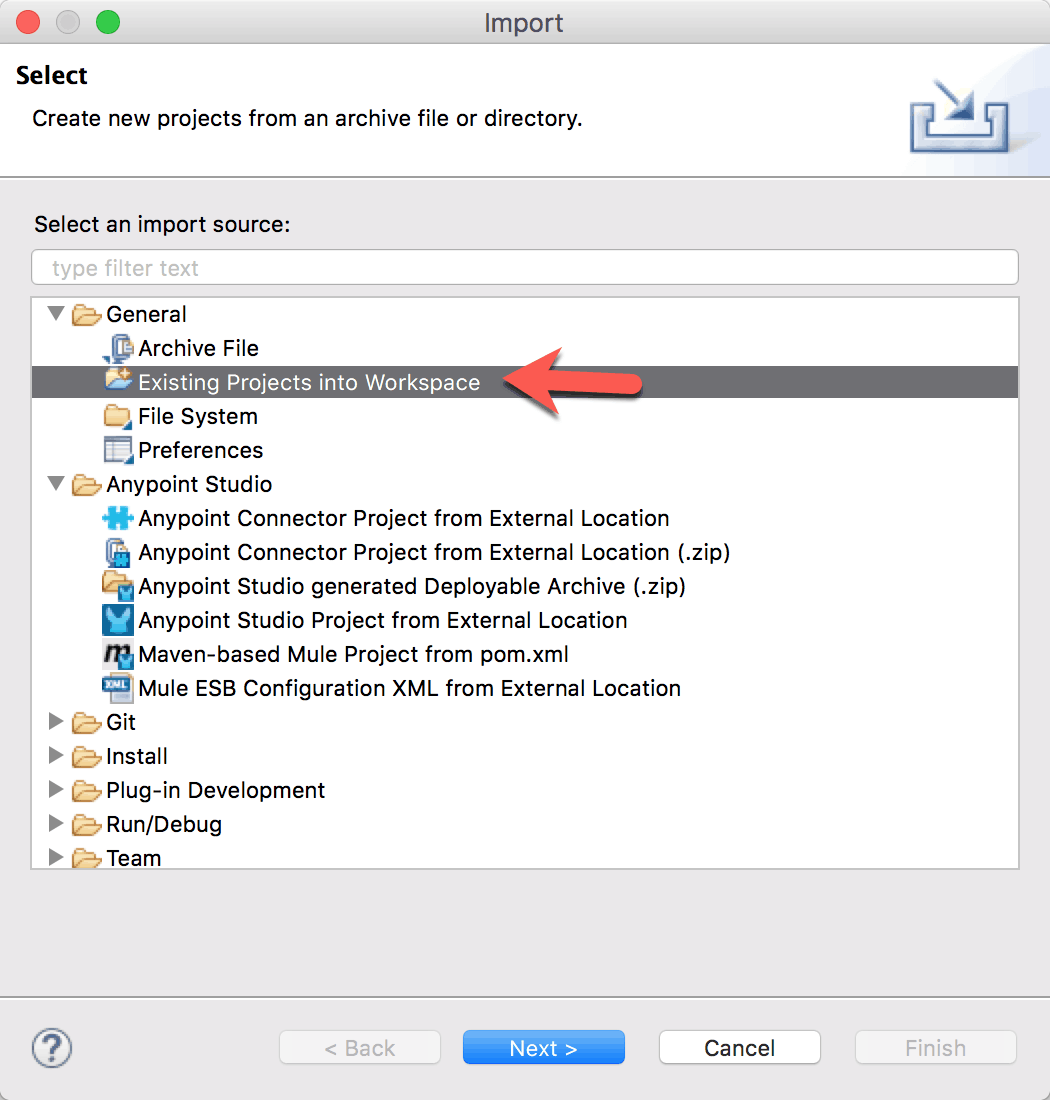
Step #3 Import project
Import the project to your workspace.
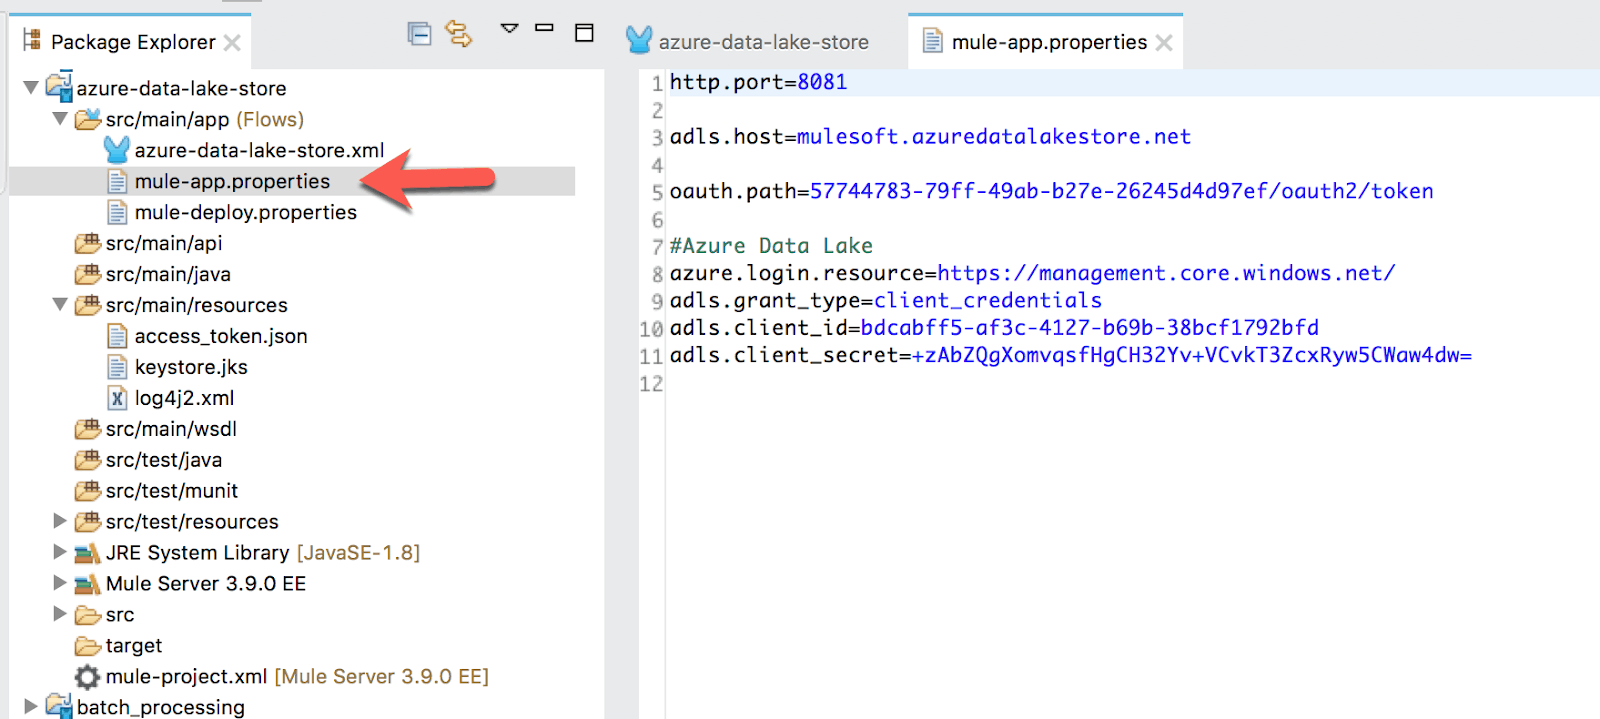
You’ll find the following class and folder structure. In this section, we’ll outline what you’ll find in each folder:
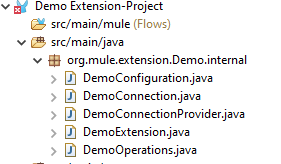
src/main/java folder
This folder contains the source Java files for your connector, including the skeleton Java files for operations and connection configuration. Additional supporting classes should be stored here as well.
Once we open this project in Anypoint Studio there will be a number of classes, which will be annotated with Mule SDK annotations as seen below:
- <connector-name>Extension.java: This class identifies the various properties of your connector. In Mule 4 a connector is nothing but an extension. This class would identify which is the configuration class, which are the operation classes.
- <connector-name>Configuration.java: This contains all the information that you want from the global configuration of the Connector.
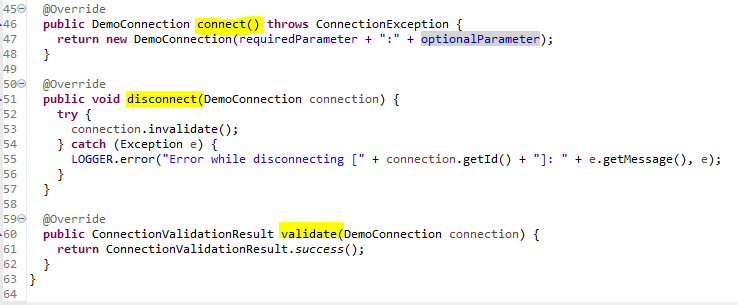
- <connector-name>Connection.java: The connection class is responsible for handling the connection and in our case, most of the actual coding will be here.
- <connector-name>ConnectionProvider.java: This class is used to manage and provide the connection with the target system.
The connection provider must implement one of the connection providers available in Mule. The options are PoolingConnectionProvider, CachedConnectionProvider, and ConnectionProvider.
- <connector-name>Operations.java: This is the class where you define all of the necessary operations. There can be multiple operation class files.
src/main/resources folder
The resources folder contains non-code resources accessed by your connector. This folder is empty when you initially create the project.
src/test/java folder
The Java folder inside the test contains the Java source for the test files for your connector, including the skeleton JUnit test case.
src/test/resources folder
Contains non-code resources accessed by your tests. This folder contains a skeleton Mule configuration file for running tests.
POM File
Based on the archetype used to create the project, Maven generates the Project Object Model (POM) file. Maven uses the pom.xml file to keep track of all dependencies needed to build a project, including the dependencies’ version number and location. You may have to add items to the POM file during the connector development process to pull in additional libraries and add steps to the build process.
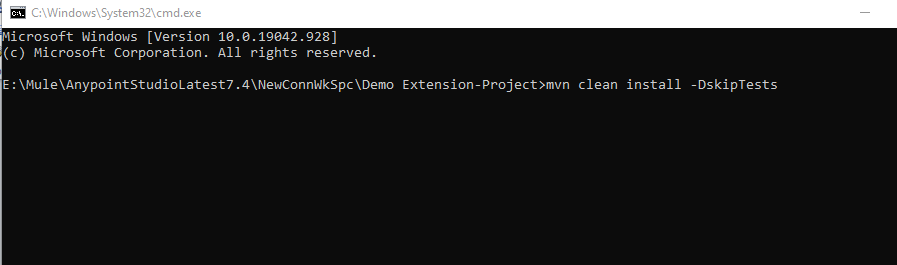
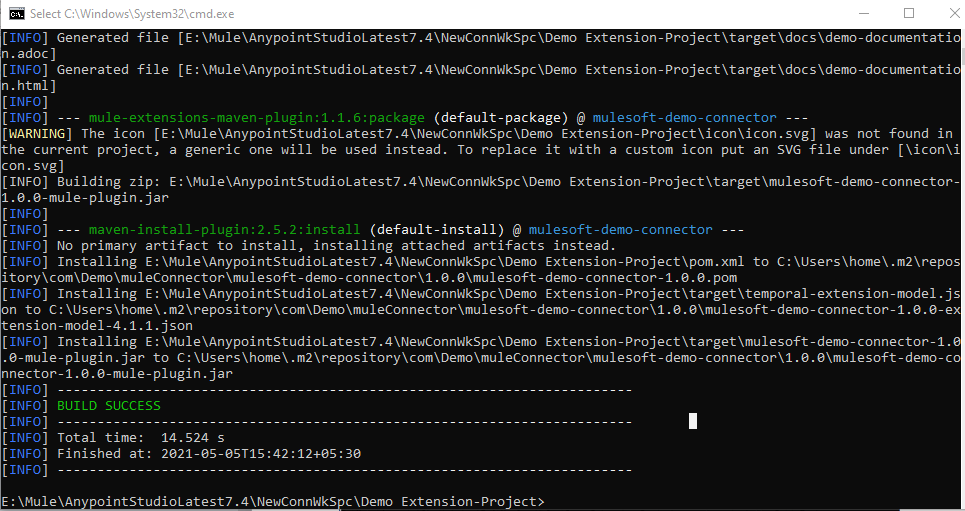
Step #4: Clean and install the project
Now go to your workspace and run the below command to build the jar:
mvn clean install –DskipTests
Step #5: Update dependencies
Now go to your Mule application (project) where you need to install the connector and update the dependency as shown below.
 <dependency>
<groupId> com.Demo.muleConnector</groupId>
<artifactId> mulesoft-demo-connector</artifactId>
<version>1.0.0</version>
<classifier>mule-plugin</classifier>
</dependency>
Step #6: Add to Mule palette
Once you add the dependency, click on save so that the connector will add to your Mule palette as shown below:
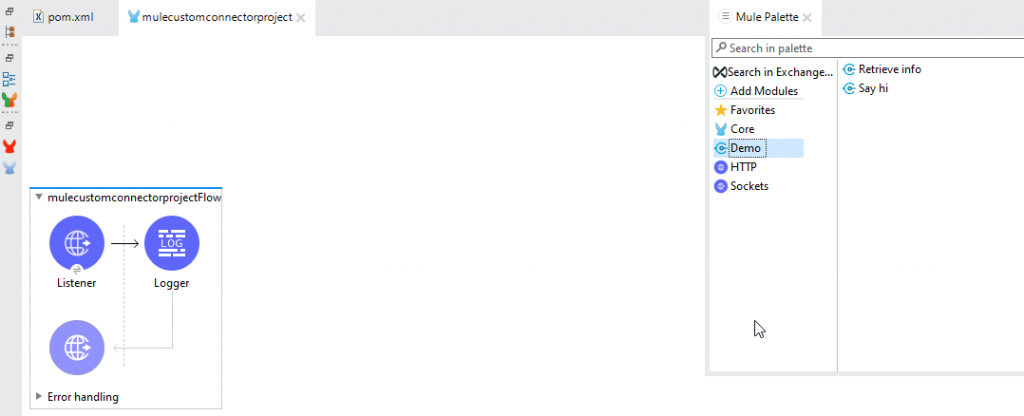
Public methods are exposed as operations. If we are defining our method as public, that operation will be visible in Mule palette which can be used in custom connectors. Every public method will be taken as an extension operation.
The private methods are not exposed as operations. If we are defining our method as private, that operation will not be visible in Mule Palette.
If you want to set up the custom configuration in your connectors, use the configuration annotation and a connection annotation for the connection instance to perform some action.
/**
* Example of an operation that uses the configuration and a connection instance to perform some action.
*/
@MediaType(value = ANY, strict = false)
public String retrieveInfo(@Config BasicConfiguration configuration, @Connection BasicConnection connection){
return "Using Configuration [" + configuration.getConfigId() + "] with Connection id [" + connection.getId() + "]";
}
If we don’t want to use any configuration in our connector we will just pass the parameters to the function.
/**
* Example of a simple operation that receives a string parameter and returns a new string message that will be set on the payload.
*/
@MediaType(value = ANY, strict = false)
public String sayHi(String person) {
return buildHelloMessage(person);
}

/**
* Private Methods are not exposed as operations
*/
private String buildHelloMessage(String person) {
return "Hello " + person + "!!!";
}
/**
* Example of a simple operation that receives a string parameter and returns a new string message that will be set on the payload.
*/
@MediaType(value = ANY, strict = false)
public String sayHi(String person, String person2) {
return buildHelloMessage(person, person2);
}
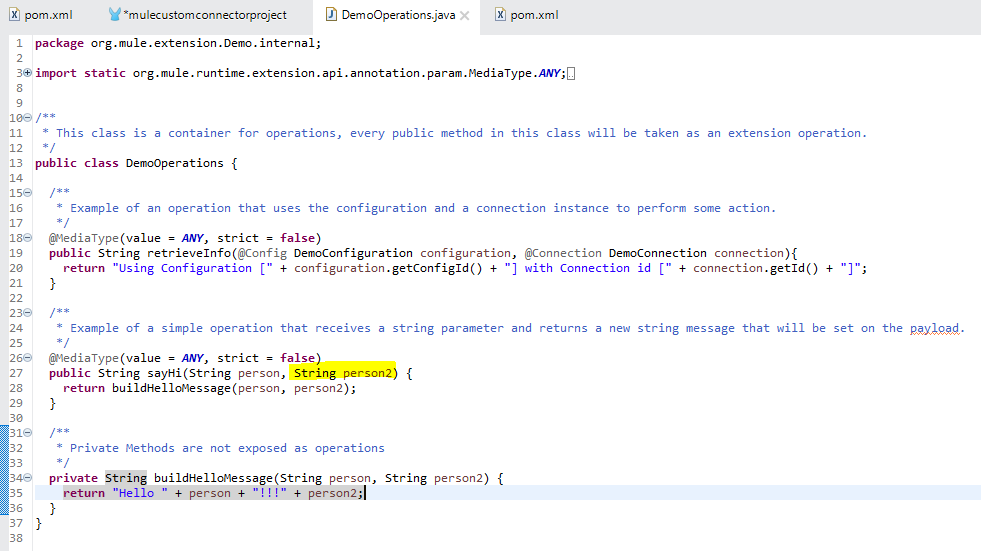
After adding the parameter, update the connector version from 1.0.0 to 1.0.1 in connector pom.xml and rerun the mvn clean install –DskipTests.
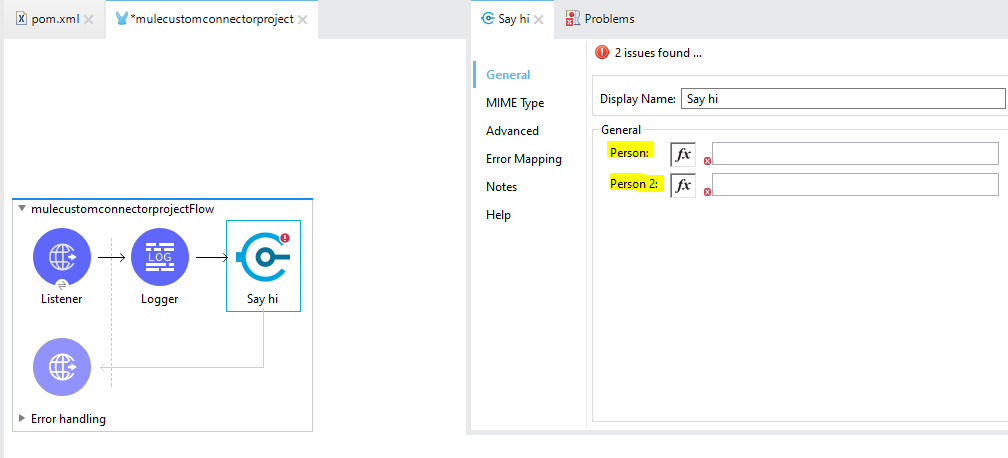
Step 7: Install connector
Now add the connector version in application pom.xml where you want to install the connector and save so that it will be updated and displayed as below:
Connector pom.xml – (POM File in Custom Connector)
<?xml version="1.0" encoding="UTF-8" standalone="no"?>
<project
xmlns:xsi="http://www.w3.org/2001/XMLSchema-instance"
xsi:schemaLocation="http://maven.apache.org/POM/4.0.0 http://maven.apache.org/xsd/maven-4.0.0.xsd">

<modelVersion>4.0.0</modelVersion>
<groupId>com.Demo.muleConnector</groupId>
<artifactId>mulesoft-demo-connector</artifactId>
<version>1.0.1 </version>
<packaging>mule-extension</packaging>
<name>Demo Extension-Project</name>

<parent>
<groupId>org.mule.extensions</groupId>
<artifactId>mule-modules-parent</artifactId>
<version>1.1.3</version>
</parent>

</project>
Sample Application pom.xml (POM File – where we are using the Custom Connector)
<dependency>
<groupId>com.Demo.muleConnector</groupId>
<artifactId>mulesoft-demo-connector</artifactId>
<version>1.0.1 </version> <classifier>mule-plugin</classifier>
</dependency>
Step #8: Create custom connector configuration
If we want to create any configuration in our custom connector, please follow the below steps:
/**
* Example of an operation that uses the configuration and a connection instance to perform some action.
*/
@MediaType(value = ANY, strict = false)
public String retrieveInfo(@Config DemoConfiguration configuration, @Connection DemoConnection connection){
return "Using Configuration [" + configuration.getConfigId() + "] with Connection id [" + connection.getId() + "]";
}
Step #9: Create configuration and connection class
We will create the object of configuration and connection class.
There is one field for configuration and two fields for connection as in the screenshot below:
/**
* This class represents an extension configuration, values set in this class are commonly used across multiple
* operations since they represent something core from the extension.
*/
@Operations(DemoOperations.class)
@ConnectionProviders(DemoConnectionProvider.class)
public class DemoConfiguration {

@Parameter
private String configId;

public String getConfigId(){
return configId;
}
}
/**
* A parameter that is always required to be configured.
*/
@Parameter
private String requiredParameter;

/**
* A parameter that is not required to be configured by the user.
*/
@DisplayName("Friendly Name")
@Parameter
@Optional(defaultValue = "100")
private int optionalParameter;
Step #10: Change display name
If we want to change the display name we can update the above “DisplayName” annotation. If we want to make field value as optional mark “optional annotation.” If you want to pass the default value you can pass as shown above.
Using this same method, we can increase or decrease the number of parameters.
If we want to create a connection using the mentioned parameters we can define in the connection class.
In this blog, we learned how to create a custom connector in Mule 4. These types of connectors are synchronized, so we have to decide on the functionality of the reusable connector. Join an upcoming Meetup event for more how-tos.