Anypoint Studio has been the only IDE to develop your mule applications for years. Should you change to Anypoint Code Builder now that it's GA? Let's discuss the difference between Anypoint Code Builder and Anypoint Studio to help you ground your understanding and make the decision that's right for you.
Why is Anypoint Code Builder something to consider?
The main difference between Anypoint Code Builder and Anypoint Studio is that the former is based on Visual Studio Code (being an extension that is added to it), while the latter is based on Eclipse but it has to be installed as an independent IDE (meaning you can't just install Eclipse and get a plugin to make it Studio, you have to install Studio on its own).
Based on this first fact, we can already see a bunch of differences between the two tools. Eclipse is an older IDE that was used mainly for Java development but has ceased to be very popular in the development community; Visual Studio Code is currently booming because of all the extra features you can install to it by downloading extensions. In fact, Visual Studio Code remains the preferred IDE among developers, with nearly 74% of users choosing it as their preference.
3 differences between Anypoint Code Builder vs. Anypoint Studio
However, this doesn't mean that Anypoint Code Builder will immediately be better than Anypoint Studio just because of the IDE it's based on. There is a steeper learning curve to start using it especially if you've been using Studio for a while and are used to the visual nature of developing low-code APIs and integrations. Besides that, Anypoint Code Builder isn't even a year old (after the GA version), so it's almost impossible to assume that it has all of Studio's functionality at this moment.
That said, let's take a look at three of the main differences between these two IDEs:
- Welcome screen
- Mule Palette
- Global configuration elements
1. Welcome screen
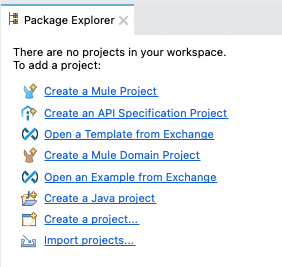
We're going to call the “welcome screen” the first view you see when opening Anypoint Code Builder (ACB) or Anypoint Studio (Studio) with no current open project. In Studio, you'd see the welcome screen with the following options in the Package Explorer (left side of the screen):
- Create a Mule Project
- Create an API Specification Project
- Open a Template from Exchange
- Create a Mule Domain Project
- Open an Example from Exchange
Not all of these options are available for you on the welcome screen for ACB. However, you have some additional options that you do not see in Studio.
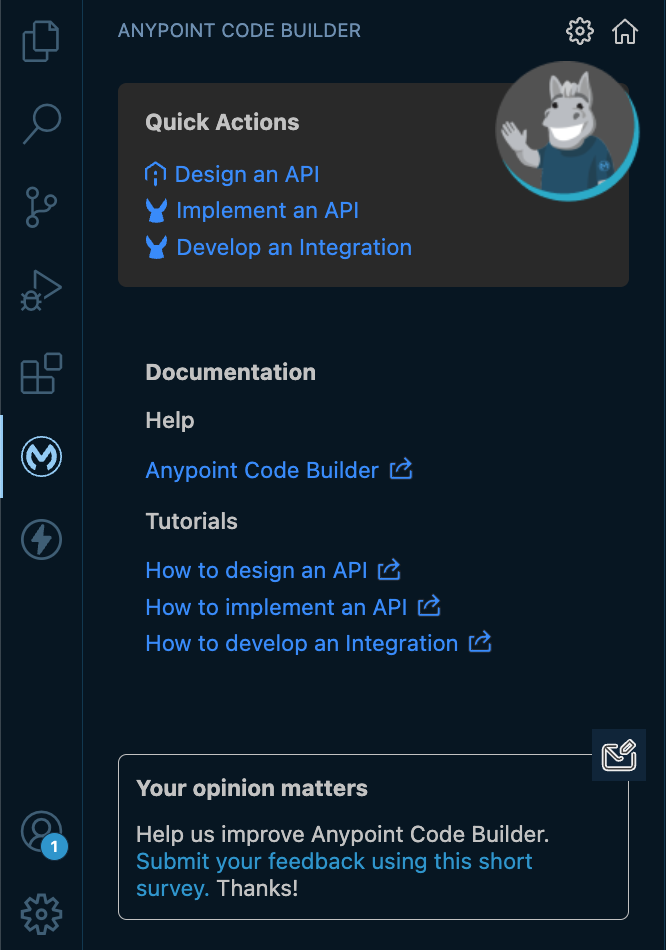
Here are the quick actions available in the welcome screen for ACB:
- Design an API (equivalent to Create an API Specification Project)
- Implement an API
- Develop an integration (equivalent to Create a Mule Project)
Besides those options, you also have some links to read the ACB documentation or to open some quick tutorials to get familiar with the interface. Besides that, there is a link to send your feedback.
While it's true that a lot of the options are not available on this first screen, like opening an example from Exchange or starting a Mule Domain project, it's also a more concise view to get started quickly in what you need to do: design an API specification, implement an API based on the specification, or develop an integration without the specification.
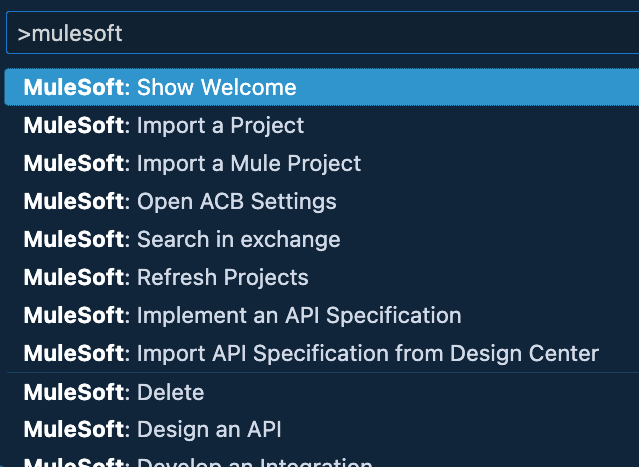
Now, something that may be new to you if you've never used Visual Studio Code before, is the command palette. You can open this by going to View > Command Palette or pressing the keyboard shortcut associated with it. Once you open it, you can search for MuleSoft and see other options available to run with ACB.
Talking about palettes, let's see how is ACB handling the Mule Palette we have available in Studio.
2. Mule Palette
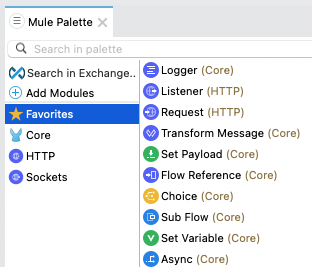
In Anypoint Studio, you'll find Mule Palette where you can get a list of all the available connectors we can use in our canvas. For example, adding an HTTP Listener, a Logger, or a Transform Message component. We simply drag and drop the component from the palette to the canvas to start developing. We can also add more modules by searching for them in Exchange and adding them to our current palette (consequently adding the module to the pom.xml file for Maven).
But this palette ceases to exist in Anypoint Code Builder. So how are we adding our components here? When we start creating a Mule project in ACB, the first option we're going to see is if we want to create a flow or a sub-flow. We can select one of those two, click on View all options, or click on the Add button at the top to see other components.
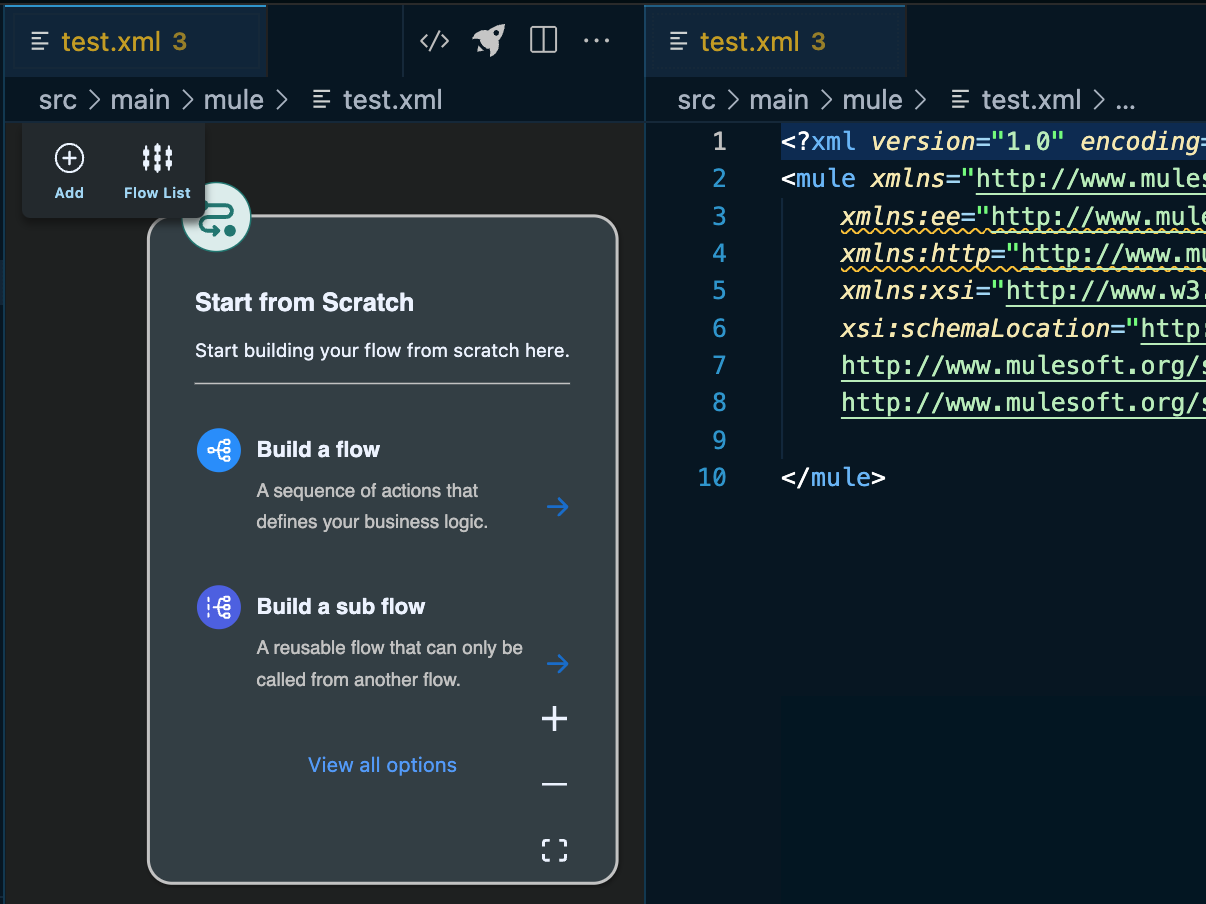
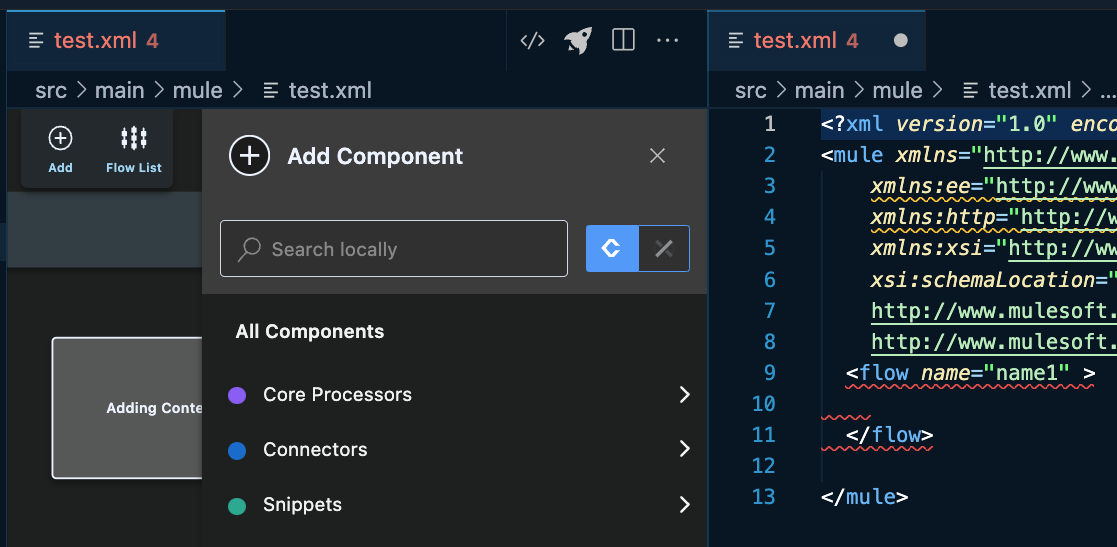
Once we select one of these options (like Build a flow) we'll now see an empty space with a + sign in the middle. If we click on that, we'll be able to start adding components to the canvas. This would be the closest equivalent to the Mule Palette in Studio.
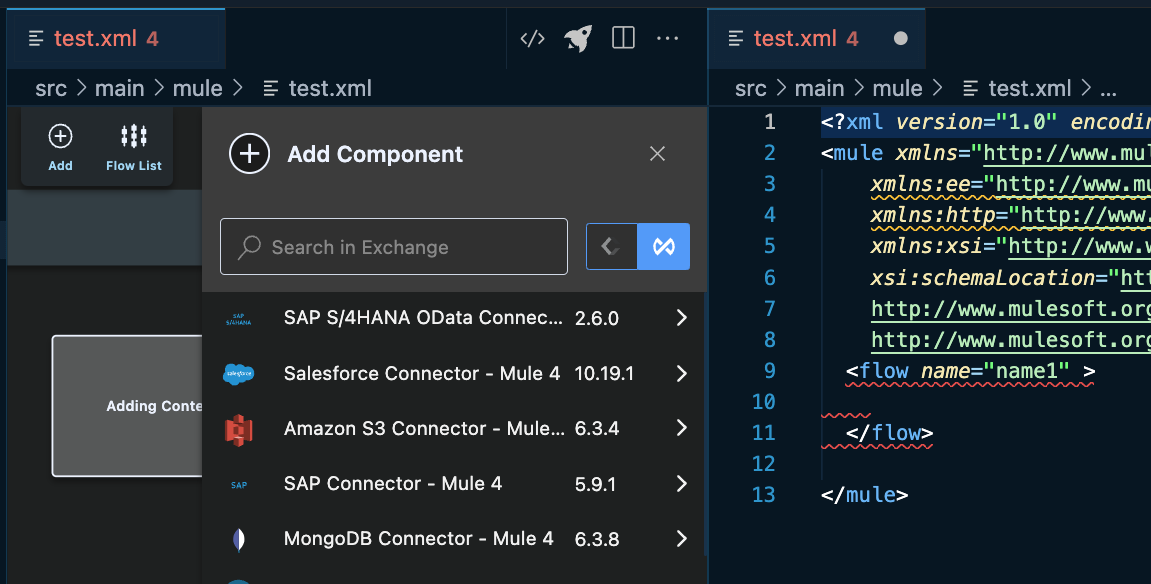
If you select the Exchange button next to the search input box, you'll be able to search modules/connectors in Exchange just as you do in the Mule Palette.
There's one more important option that we're able to use in Studio: adding Global Configuration Elements from the Global Elements tab. Let's see how this changes in ACB.
3. Global configuration elements
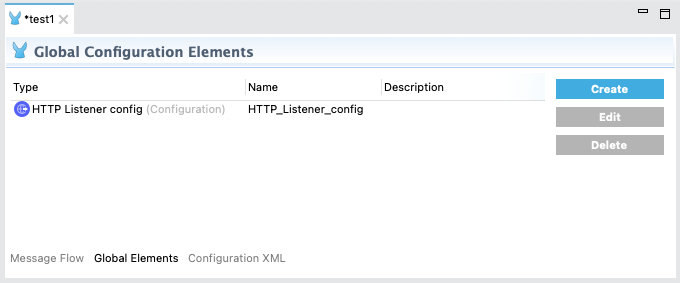
In Anypoint Studio, when we open a Mule Configuration file (an XML file) and go to the Global Elements tab, we have these buttons to create, edit, or delete configurations. For example, an HTTP Listener where we specify the host and the port.
There's no such thing in Anypoint Code Builder. As of 2023, the only way to add these configurations is to do it directly in the XML code. The good thing about using Visual Studio Code is that we get suggestions on what we are trying to add to the code, as opposed to Eclipse (Studio).
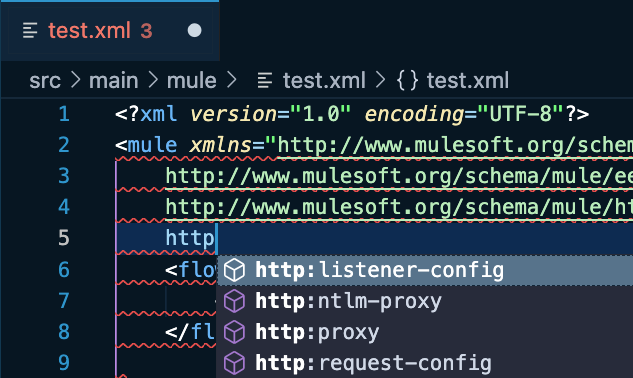
To add an HTTP Listener configuration in ACB, you can just go to the XML file, start typing “http” and select the listener-config option. Make sure you are writing this outside of any flow or subflow.
Once you add the main configuration, you will have to add the rest of the properties. So inside this new configuration, write “http” once more to reveal the available options and select the listener-connection option.
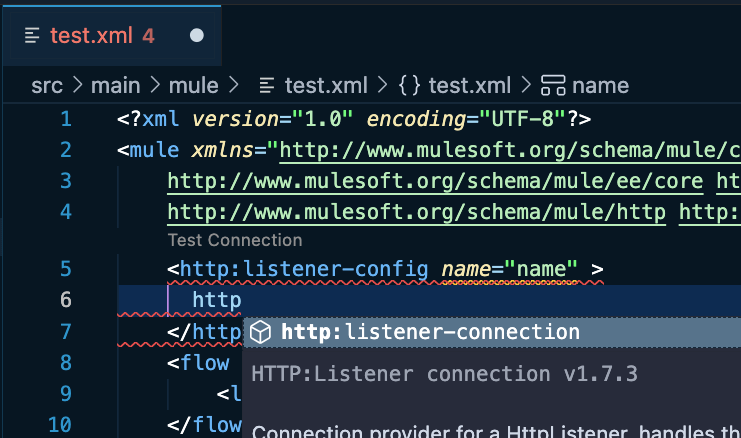
This process will result in a final configuration similar to this:
<http:listener-config name="name">
    <http:listener-connection host="0.0.0.0" port="8081" />
</http:listener-config>
For some people, this might look more exciting because they get to work more with the code and not so much with the user interface. However, MuleSoft is widely known to be a low-code tool and a lot of people prefer it for its drag-and-drop way of developing integrations.
ACB – one day at a time
Anypoint Code Builder is still in its early versions. We shouldn't treat this as a finalized IDE or something comparable to what Anypoint Studio has to offer so far. Studio has had years of development and releases to make it what it is today. ACB was just released as GA in less than a year. But surely in just these months of testing, you can see its real potential for the future.
The ACB team keeps gathering feedback to improve this tool in future releases. In early 2024, there will be some amazing updates to the GUI and its visual functionality. This first version is more focused on the code part so we can all start experimenting with it, but it will get to a point where it's faster and easier than Studio.
Please note that some functionalities will change in future ACB releases.